ME, MYSELF AND SCROLL SAW
Tuesday, February 4, 2014
Sneak Peek - Deer Head Plaque
Saturday, February 1, 2014
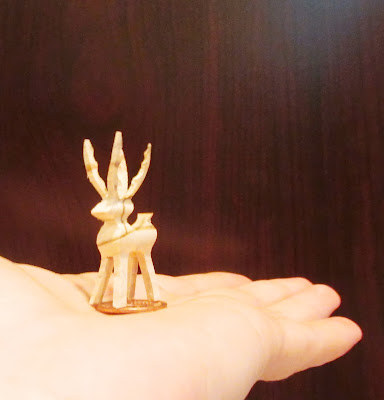
Miniature Deer's Head - a Weekend Project
Tuesday, January 28, 2014
Victoria Carriage Scroll Saw Project - Finale
The design of a Victoria carriage that I've finished last week is based on a typical carriage made in Dereham at the end of the 19 century and which Mr. Skinner (the Original Director of Hobbies in December 1895) used to transport himself and his family to church each Sunday.
The design has been reproduced by Hobbies Design as close to the original as possible. The original that you see in black/white picture was cut in white holly.
I used black walnut and white ash for my Victoria Carriage to get the contrast of 2 woods and enhance the beauty of the carriage.
The Victoria Carriage is 13,5" long and 7" high. There are 3 seats there:
the coachman's seat and the passengers' seat
as well as a place for your baggage
The floor of the Victoria Carriage is covered with a velvet paper color Wine.
I used working LED coachman lights to make it easy for a coachman to drive in the dark.
Victoria Carriage pattern for scroll saw by Hobbies.
Sunday, January 26, 2014
Victoria Carriage Scroll saw Project - Day 8
Ah! Ah! Ah! Decisions, decisions, decisions.
Firstly, based on the plan, I made these kind of knobs (whatever they are called in real life,:))). I liked the contrast in colors, and the wheels actually were working,
but very wiggly...
After observing my Victoria carriage for a couple of days I decided to change the knobs and make the wheels non-working.
The good thing is I can change my mind again and make the wheels working even with new knobs, but then a question is raised: where this carriage would bring me?
Natalia, looking for horses...
Wednesday, January 22, 2014
Victoria Carriage Scroll Saw Project - Day 7
Here is a fun day has come...
At least I thought so.
I've learnt it from doing miniature needlepoint: one thing is to stitch and absolutely different thing is to put your final project together.
The scroll saw pattern for a Carriage doesn't have instructions on how to assemble it. So, based on a provided picture of a carriage in black/white color I started to put it together.
In spite of the fact that all parts fit each other perfectly I made a mistake assembling this piece. Thanks to my intuition I haven't glued anything yet.
I put together the base and assembled the driver's seat.
Added some decorative parts on the sides of a carriage and steps.
I decided to use some velvet paper (color Wine) to cover the floor of the carriage and bring more color to it,
and then real life took me away from the miniature world leaving the carriage at this unfinished point:
to be continued...
Natalia
Tuesday, January 21, 2014
Victoria Carriage Scroll Saw Project - Day 5-6
Last 2 days took me to finish the pieces of my Victoria carriage.
I used 3 coats of Clear Wood Finish Spray (Satin) with sanding in between of coats.
This is a picture of the parts of the carriage before applying Satin Finish
and after
Feel the difference? I wish you could have a chance to touch it - it is sooo smooth, :))))
Tomorrow I will have an absolutely different fun - I will enjoy putting it together!
Natalia
Sunday, January 19, 2014
Victoria Carriage Scroll saw Project - Day 4
Saturday, January 18, 2014
Victoria Carriage Scroll Saw Project - Day 3
Friday, January 17, 2014
Victoria Carriage Scroll Saw Project - Day 2
Wednesday, January 15, 2014
Victoria Carriage Scroll Saw Project - Day 1
I keep working on cutting out the pieces for my Steeple Church and in between I've decided to start a new project - Victoria Carriage. I am using 2 kinds of wood: walnut and white ash, 1/8" thickness each.
Today I cut out a couple of pieces:
I am very excited to keep working on this project...
See you tomorrow,
Natalia
Tuesday, November 19, 2013
Steeple Church - Wok in Progress
Saturday, November 16, 2013
Steepled Church
The pieces you saw in my previous post are parts for my new project - The Steepled Church. Today I did easy job and cut out the parts of the building: walls, floor, roof, etc..., everything that requires straight lines. This is a rough dry fit with the patterns still applied to the wood.
I have to do some corrections, then will put it together, but tomorrow, hopefully, the weather allows to work since my workshop is in the garage right now and I prefer to work with the garage door opened. I need to do more cutting...
Have a great weekend!
Natalia
Friday, November 15, 2013
New Project for the coming weekend
Thursday, November 14, 2013
Collapsed castle # 1
I used the design from the previous post to cut out a collapsed castle using the scroll saw.
The castle hasn't been finished yet, but at least now you know what the design was for. Can you see the road leading to the gates? or princess looking out of the window with sadness in her eyes waiting her prince to arrive? No? Give me some time...
Natalia
Thursday, October 3, 2013
Sunday, August 11, 2013
3D Deer Contest at Steeve Good's Blog
Steeve Good opened a 3D Deer Contest on his blog http://scrollsawworkshop.blogspot.com/2013/08/3d-deer-cutting-demonstration-plus.html.
Along with the rules of the contest he provides instructions and video on how to cut a 3D Deer without a pattern.
Today I cut 2 little deers, the height of the tallest is about 1 1/2". A penny is for a reference.
Back to practicing,
Natalia
Wednesday, June 5, 2013
Sunday, December 2, 2012
Compound Scroll Sawing in 1/12th scale. Dollhouse Miniature Figurines. Part 3
Saturday, July 14, 2012
New project - Lidded Work Basket
As I have already told you, I have an amazing book with beautiful patterns that is called The Art of the Scroll Saw. I saw some of the patters in different sources and each time with different authors' names, it makes me confused a little bit, but anyway today I went through the book again and picked up one that is called Lidded Work basket. I must tell you a secret: being inpatient I made this basket already in 1/12th scale. I wanted to make a post about it, but then decided to make another one but in real size to give the impression of sizes. When I am done with this basket, I will post an image of all of them.
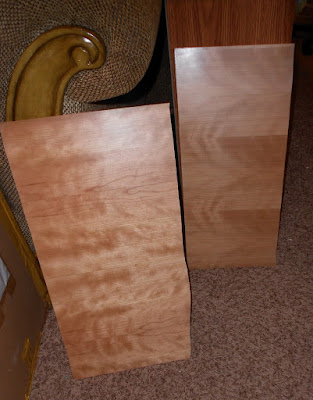
I bought a nice piece of cherry, 1/4th thick, cut it and finished with Lacquer Sanding Sealer and Clear Wood Finish Semi-Gloss (on the picture you can see Satin, but at the time I decided to take a picture of it, Semi-Gloss was finished and tossed).
I put 3 coats and sanded in-between. Just Loved the result: smooth touch, :)))
Then I covered the pieces with blue tape (I don't like to glue the patterns on the wood) and attached the patterns on the top.
Tomorrow - sawing!!!
Here is another project that I prepared to cut (also real size), but later about it...
Wednesday, June 13, 2012
Compound Scroll Sawing in 1/12th scale. Part 2
So, I prepared patterns to be cut off. I used Cherry 3/4" thick.
First I cut the side with a swan. I used so-called "trapping" method.
This is how front side looks like

This is a back side

Then I cut another side of the pattern. Here you can see front side and back side:


The swan was born!


Next I cut the shell looking holder. I think in miniatures world it can be used as a cards' holder or newspapers' holder, or just for decoration on a table.

Last but not least, a snail was born. I don't care too much about this figurine but it was nice to practice.

Here is my trio:


After little sanding the figurines have this look:


to be continued...
Natalia
First I cut the side with a swan. I used so-called "trapping" method.
This is how front side looks like

This is a back side

Then I cut another side of the pattern. Here you can see front side and back side:


The swan was born!


Next I cut the shell looking holder. I think in miniatures world it can be used as a cards' holder or newspapers' holder, or just for decoration on a table.

Last but not least, a snail was born. I don't care too much about this figurine but it was nice to practice.

Here is my trio:


After little sanding the figurines have this look:


to be continued...
Natalia
Subscribe to:
Posts (Atom)


